|
Step
1
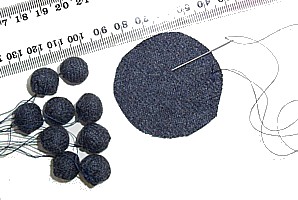
You will need strong thread (quilting cotton is very sturdy),
fabric cut into 50mm diameter circles (the bottom of a shot
glass is often not a bad size) and a sewing needle.
You do NOT need extra stuffing for the button. They will stuff
themselves. |
 |
Step
2
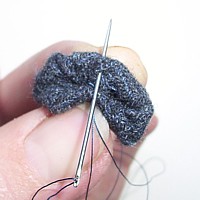
Cut your thread about 60cm long and double it, so you are
sewing with 30cm of doubled thread. This will give you a sturdy
thread for pulling the sides of the button in later on.
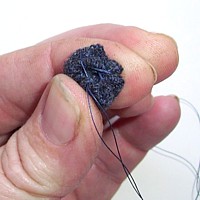
Measure in about half a cm or a tiny bit more. Knot the thread
in from the edge by passing the thread through the tied-off
loop. If you don't do this, you will most likely pull the
thread right through when you tighten it.
Okay. Ready to start!
|
 |
Step
3
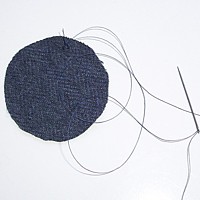
Do a running stitch around the circle.
You need to be in about 5mm from the edge if you are using
wool or linen. Too much more and your button won't end up
round, too much less and it won't be stuffed enough.
Sew all the way around to the start. If you are using silk,
make your knot and sewing circle in towards the centre further.
|
 |
Step
4
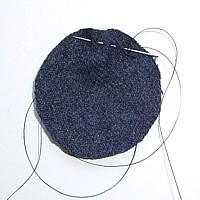
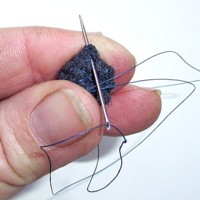
When you are back at the start, sew to the other side of the
circle.
You will need your thread on that side when you pull it tight. |
 |
Step
5
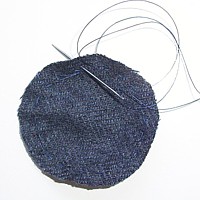
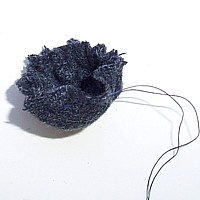
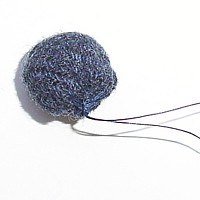
Tighten the thread a bit so you have a bird's nest. Not too
tight, though.
The edges are going to tuck underneath in a minute. |
 |
Step
6
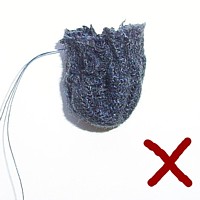
Do NOT tighten it so much that it pulls tight like this.
This is too tight.
Slacken the thread off a bit. |
 |
Step
7
Tighten your thread enough so you can put the edge of the
circle in the middle.
It looks a bit like a shower cap. |
 |
Step
8
As you tighten the thread some more, the fabric will fold
inwards, not outwards.
You will need to help it fold inwards by holding it.
If you put it down, it will spring open again.
The wool on the inside of the stitching is what stuffs the
button when it is tucked in. |
 |
Step
9
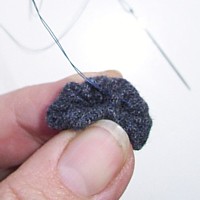
To start sewing the button closed, first check that the edge
of the button is folded inside.
Good. Keep going.
Stitch directly opposite where the end of the thread is and
pull it tight. It looks like nothing like a button at this
stage. Don't be discouraged. |
 |
Step
10
Stitch back to the start.
Squeeze the button as you sew and pull the thread tightly.
Your button looks like this now. Still not like a button.
|
 |
Step
11
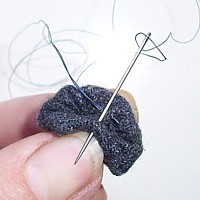
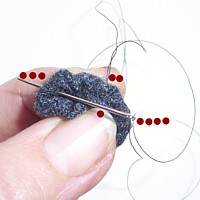
You need to sew to sides into the middle now.
Looking at the dots in the picture: First you stitched up
and down, now you're going to stitch side to side.
Keep squeezing the button in and you sew.
Don't be upset that your button looks terrible at the this
stage. It will look better as you stitch. It only doesn't
look like a button because you haven't finished.
|
 |
Step
12
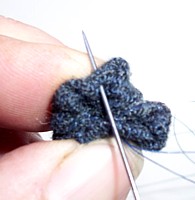
At this stage, your button will look more like a flower than
a button.
You need to stitch the sticking out bits into the middle.
Again, work from across the button, stitch in, go across,
stitch in.
Pull hard on the thread to pull the fabric in. |
 |
Step
13
While you are stitching the side bits in, your button will
look like this.
Don't give up! It improves very soon.
Just keep finding the bit that is sticking out the most and
stitch it in to the middle. Then the next bit. Keep going. |
 |
Step
14
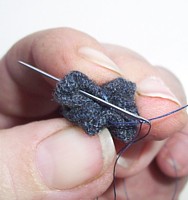
Soon you will run out of bits that are still sticking out.
This picture shows a few more bits to stitch in, but it is
looking more like a button than before.
You can see how I'm working across the button as much as I
can.
You really do have to squeeze the button in and pull
the thread hard as you go. This pulls everything in.
|
 |
Step
15
Two more sticking out bits- top and bottom- and my button
is done!
If your button still looks a bit uneven, it's because you
haven't finished yet. Keep stitching everything in. |
 |
Step
16
With all the bits pulled in and stitched down, it finally
looks like a button! If it's a tiny bit lop-sided, squeeze
the button into a ball.
Tie a knot through the thread crossovers in the middle and
knot it off.
Don't cut your thread unless you need to make all your buttons.
(Say, if you're doing them at work in your lunchtime and your
gown or hood is at home.) You do need it to sew your button
onto your gown, kirtle, cotehardie or hood.
|
 |
Step
17
Looking at the button from the side- a little, round wool
berry!
While you have the thread still attached, you can sew the
button onto your gown, cotehardie or hood. If you DO cut the
thread, make sure you leave enough thread for sewing the button
on before you cut it. It's always better to leave too much.
Remember, buttons sit on the very edge of the garment, not
set in a centimetre from the edge like modern clothes.
|
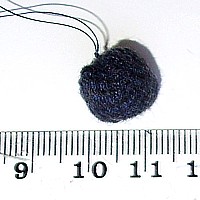 |
Step 18
If you squeezed your button in and pulled the thread hard
as you sewed, your button will be this size!
Happy sewing!
|